How to Choose Leather Menu Covers for Your Restaurant
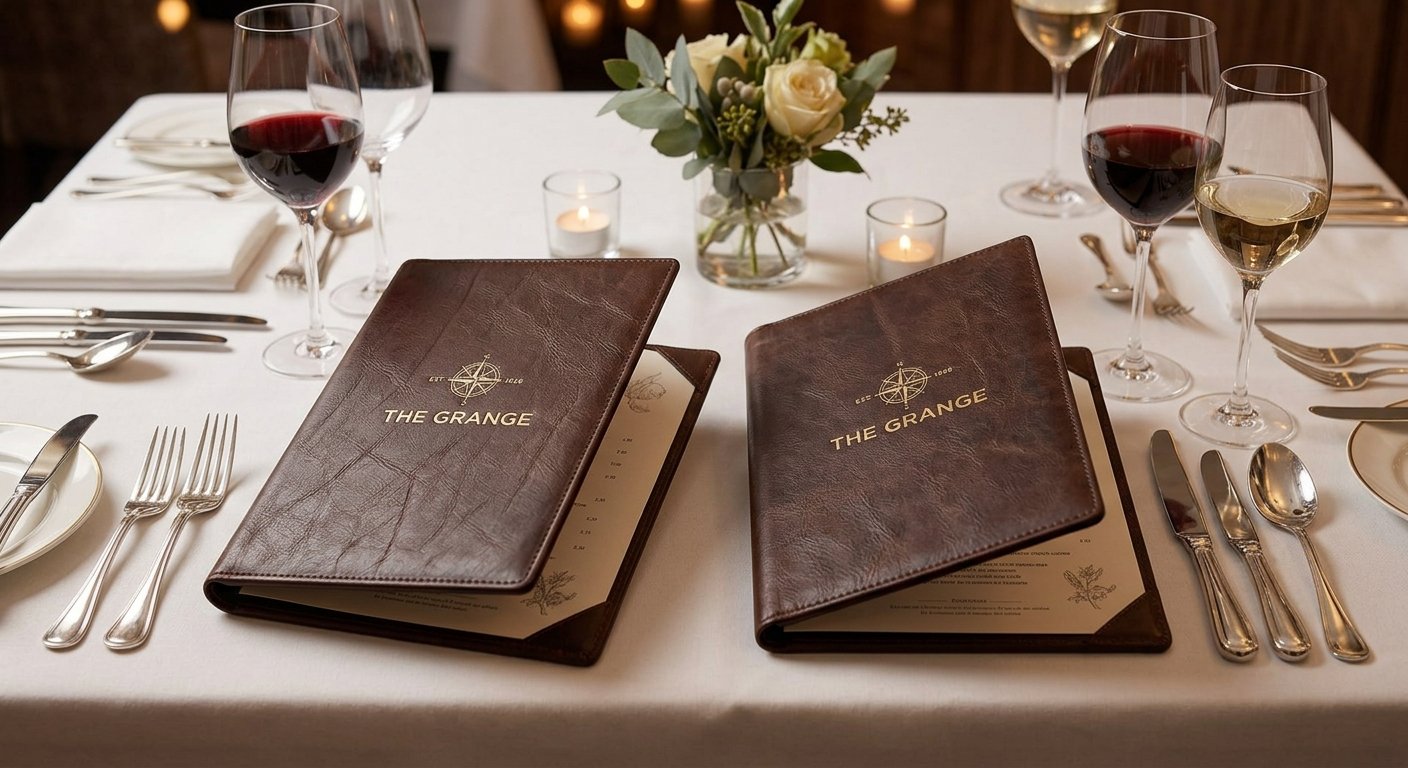
Leather menu covers are one of the most visible investments a restaurant can make. They sit on every table, handled by every guest, multiple times per service. A well-chosen leather menu cover communicates quality before a single dish arrives. A poorly chosen one — or worse, a cracked, faded substitute — undermines everything the kitchen produces.
This guide covers everything you need to know before ordering leather menu covers for your restaurant: material grades, sizes, logo options, quantity planning, pricing from China suppliers, and how to avoid the most common mistakes first-time buyers make.
1. The Four Leather Grades — and Which One Your Restaurant Needs
The single most important decision in choosing leather menu covers is the material grade. This determines quality, durability, feel and cost. Most buyers don’t realise there are four fundamentally different materials all sold under the name “leather.”
Full-grain cowhide leather
The highest quality option. Cut from the outermost layer of the hide, retaining the full natural grain and surface texture. Full-grain leather develops a patina over time — the more it is handled, the richer and more characterful it becomes. This is the material used in luxury goods.
Best for: Fine dining, wine bars, private members clubs, any restaurant where tactile quality is part of the brand identity. Guests notice the difference immediately.
Expected lifespan: 5–10 years with proper care.
PU (polyurethane) leather
A synthetic material with a consistent, uniform finish. PU leather has improved dramatically in quality over the past decade — at a glance, it is visually indistinguishable from genuine leather. It is easier to clean, resistant to spills, and maintains consistent colour across batches. It does not develop a patina.
Best for: Casual dining chains, pub groups, hotel F&B outlets with high table turnover, anywhere that values consistency and easy maintenance over premium feel.
Expected lifespan: 2–4 years.
Bonded leather
Made from leather scraps and fibres bonded with polyurethane. Lower cost, decent appearance initially. However, bonded leather is prone to peeling and delamination after 12–18 months of regular use — the surface separates from the backing. Not recommended for permanent menu covers.
Best for: Seasonal menus, temporary installations, budget refreshes where you expect to replace covers frequently.
Vegan / synthetic leather
Fully synthetic, no animal products. Water-resistant options available. Quality varies significantly — at the premium end, vegan leather is a legitimate choice for upscale restaurants with sustainability commitments.
Best for: Outdoor dining, poolside service, restaurants with vegan brand positioning.
| Material | Feel | Durability | Price range | Best for |
|---|---|---|---|---|
| Full-grain cowhide Premium | Natural, develops patina | 5–10 years | $15–25/pc | Fine dining, wine bars |
| PU leather | Consistent, easy to clean | 2–4 years | $8–14/pc | Casual dining, chains |
| Bonded leather | Leather-like initially | 1–2 years | $5–9/pc | Seasonal / budget |
| Vegan synthetic | Varies by grade | 2–3 years | $8–16/pc | Outdoor, poolside |
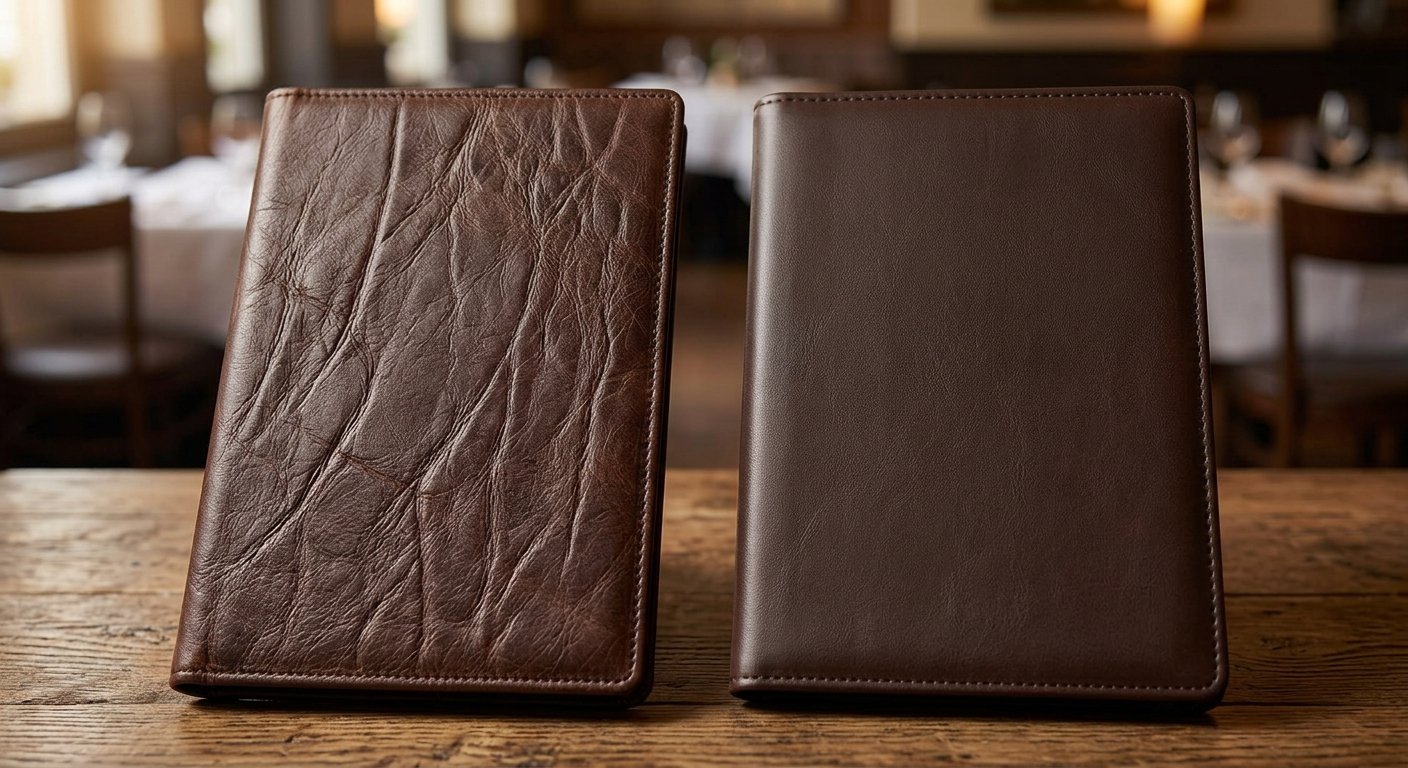
Left: full-grain cowhide with natural grain. Right: PU leather with uniform surface. Both photographed at the same scale.
If you’re unsure, order a sample of both full-grain and PU leather before committing to production. The difference is immediately obvious when you hold both. The cost difference per cover is typically $5–8 — across 60 covers, that’s $300–480 extra for the premium option. For a restaurant spending thousands monthly on other elements, this is a small investment for a significant quality signal.
2. Size: How to Match Your Menu Covers to Your Actual Menus
Menu cover size is determined by your menu pages — not the other way around. The cover should be slightly larger than your printed pages, allowing a small border on all sides. Most restaurants make one of two mistakes: ordering covers that are too tight (pages buckle and won’t lie flat) or too large (the menu looks lost inside).
Standard sizes and what they fit
- A5 (148×210mm closed): compact, suits café menus, dessert lists, drinks menus. Fits in a server’s apron pocket.
- A4 (210×297mm closed): the most common size. Fits standard printed A4 pages with a small border. Works for the majority of restaurant main menus.
- US Letter (216×279mm closed): the North American equivalent of A4. Specify this if your printer outputs letter-size pages.
- Oversized / tasting menu format: larger than A4, often landscape, for tasting menus and premium wine lists. Custom sizing, no additional charge.
How to measure correctly
Measure your printed menu pages (not the paper size — the actual content area if you’re using a bordered print). Add 5–8mm on each side for the cover border. This is the closed size to specify when ordering. If your menu is spiral-bound, measure the spine thickness too — the cover needs to accommodate this.
Send us your menu dimensions directly and we’ll size the covers to match. No extra charge for custom sizes. This is one of the real advantages of ordering from a factory-adjacent supplier — standard factories charge tooling fees for non-standard sizes. We don’t.
3. Colour: Choosing the Right Leather Tone for Your Restaurant
Leather colour should align with your restaurant’s interior and brand identity. The menu cover is a brand touchpoint — it should feel like it belongs on your table, not like a generic product that could belong to any restaurant.
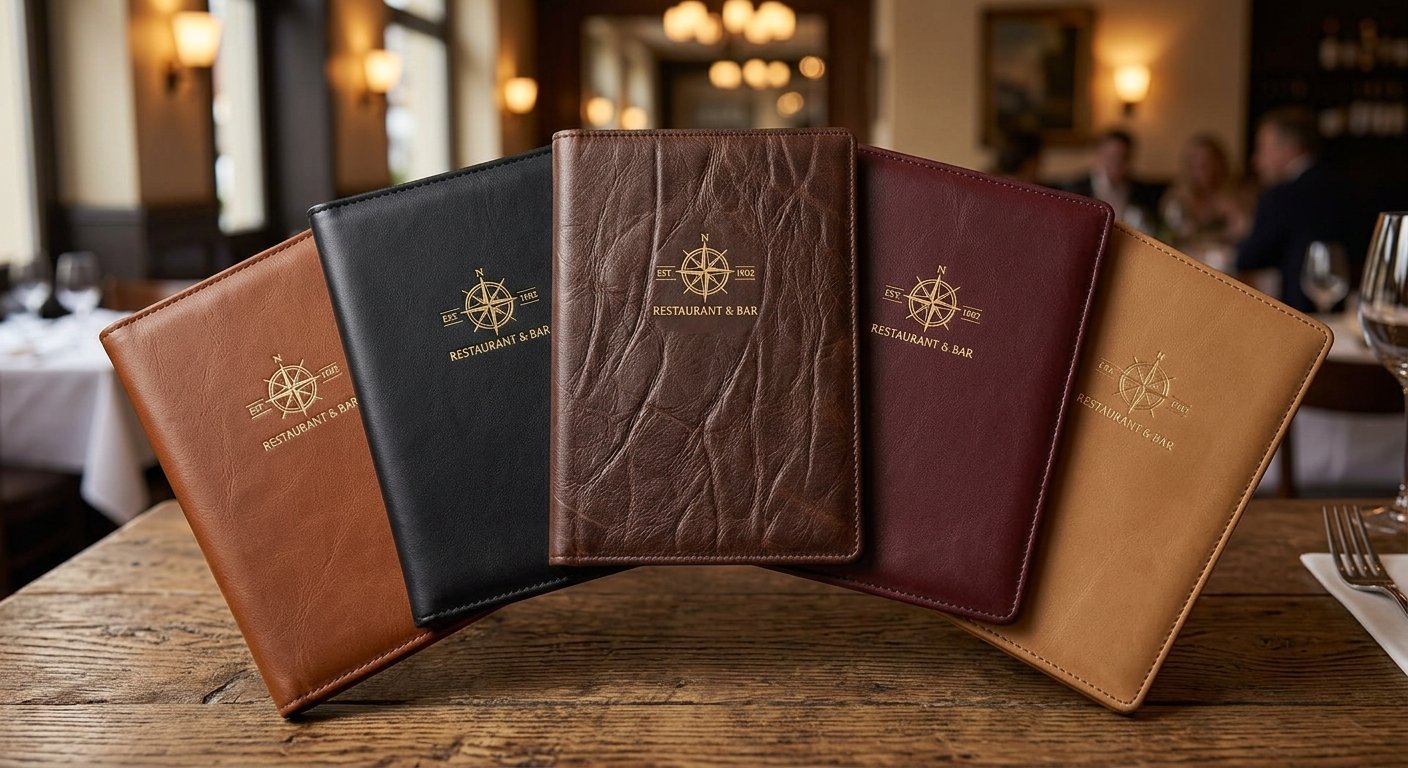
Five standard leather colours on the same menu cover design: Tan Brown, Black, Dark Brown, Burgundy and Camel.
| Colour | Works well for | Avoid if |
|---|---|---|
| Black | Modern fine dining, contemporary bistros, minimalist interiors | Warm, rustic or Mediterranean-themed restaurants |
| Tan Brown | European bistros, steakhouses, casual fine dining | Very modern or clinical interiors |
| Dark Brown | Traditional dining rooms, wood-panelled interiors, private clubs | Light, airy or Scandi-aesthetic spaces |
| Burgundy | Wine-focused restaurants, brasseries, French cuisine | Asian cuisine restaurants, very modern spaces |
| Camel | Natural wine bars, relaxed bistros, Mediterranean | Formal fine dining |
| Navy | Seafood restaurants, nautical-themed venues, members clubs | Warm-toned interiors |
One practical note: natural leather has slight batch-to-batch colour variation. If you need strict colour consistency across a large order or are matching existing pieces, PU leather is more reliable. We can also Pantone-match leather colours for orders of 200+ pieces — ask when enquiring.
4. Logo Embossing: Which Technique and Where to Place It
The logo treatment is what transforms a generic leather cover into a branded piece. There are four techniques, each with different visual effects.
Gold foil stamping
A hot-press technique that applies metallic gold foil to the leather surface. The most popular choice for fine dining menu covers. Sharp edges, high-contrast result, premium appearance. Works best on dark leather (black, dark brown, burgundy) where the gold stands out clearly.
File requirement: Vector file (AI, EPS, or PDF with outlined fonts). Minimum line weight 0.5mm for clean stamping.
Silver foil stamping
Same technique as gold, using silver foil. Suits contemporary restaurant identities and lighter leather colours where gold might look too warm. Popular for modern bistros and design-led venues.
Blind deboss
The logo is pressed into the leather with no foil or ink — the indentation is visible through shadow and texture. Understated, tactile, sophisticated. Favoured by restaurants that want quality without ostentation. Works on all leather colours and is particularly effective on full-grain leather where the natural grain contrast makes the deboss more visible.
Colour emboss
Logo raised in a contrasting colour — for example, white on black leather. Bolder effect, suits restaurants with a strong graphic identity. Less common than foil, but distinctive when executed well.
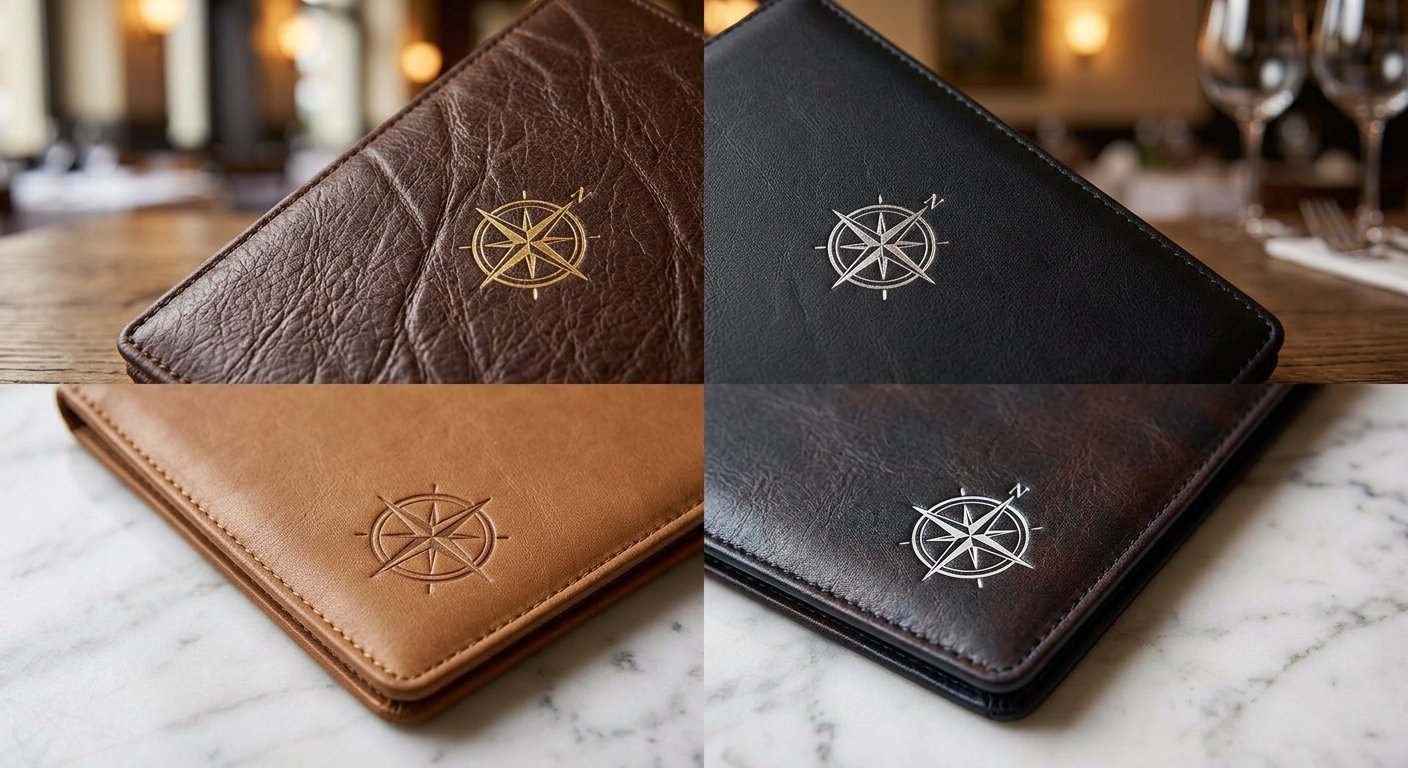
Four logo treatment options on the same dark brown leather: gold foil (top left), silver foil (top right), blind deboss (bottom left), colour emboss in cream (bottom right).
Where to place the logo
- Centre of front cover: the classic position. Maximum visibility. Works for logos with clear vertical symmetry.
- Bottom-right corner: subtle, understated. Suits restaurants that want branding to feel discreet rather than dominant.
- Top-centre: often used for logos with a wide horizontal format. Good for wordmarks.
- Inside front cover: visible only when the menu is open. Used by restaurants that prefer the exterior to be completely clean.
We send a digital proof (dieline with logo placement) before any production begins. You approve the exact position, size and technique before a single cover is made. This is standard for all orders — there are no surprises.
5. Interior Configuration: Pockets, Spines and Closures
The interior of a menu cover determines how your menu pages are held. Most restaurants don’t think about this until they receive covers that don’t work with their actual menu format.
Single-spine (open)
A simple folded cover with no interior pockets or slots. Menu pages are loose inside. The simplest and most economical configuration. Works well for menus printed on card and laminated, or menus that change frequently (loose pages can be updated without replacing the cover).
Corner pockets
Four small leather or plastic triangular pockets at each corner hold the menu page in place without a full sleeve. Pages can be slid in and out easily. Popular for restaurants that update menus seasonally.
Full interior sleeve
A full-width pocket on each interior side. Menu pages slide in completely, held securely on three sides. Cleaner appearance than corner pockets. Best for printed card menus or laminated pages.
Multi-pocket insert
Multiple clear pockets, typically 4–8, allowing a multi-section menu (starters, mains, desserts, drinks) in a single cover. Popular for comprehensive menus. Adds slightly to the cost and thickness.
Closures
Most menu covers have no closure — they simply fold open. A closure is useful if covers will be stacked, stored or handled frequently outside of service. Options include magnetic snap (invisible, clean look), ribbon tie (traditional, elegant), and elastic band (casual, flexible).
6. How Many to Order: The Quantity Planning Formula
This is where many first-time buyers miscalculate. Order too few and you run out; order too many and you tie up capital in stock you won’t use for years.
The right formula: table count × 1.2 × number of menus per table.
For a restaurant with 50 tables, one food menu per place setting (4 per table), and a separate wine list (1 per table):
- Food menu covers: 50 × 4 × 1.2 = 240 covers
- Wine list covers: 50 × 1 × 1.2 = 60 covers
The 1.2 multiplier (20% buffer) accounts for damage, loss and the inevitable guest who walks off with a particularly nice-looking cover. It also means you won’t need to reorder for 12–18 months.
Our minimum order quantity is 50 pieces per SKU (per product, per colour, per size). For most restaurants with 30+ tables, a full set of menu covers and wine list covers will comfortably exceed this minimum. For smaller venues, order 50 covers regardless — the surplus is your replacement stock for the next year or two.
7. Pricing: What Leather Menu Covers Actually Cost from China
There is significant confusion in the market about leather menu cover pricing because the same product name covers a wide quality range. Here is an honest breakdown.
| Price range (ex-factory) | What you’re getting |
|---|---|
| $3–7/pc | Bonded leather or very low-grade PU. May look acceptable in photos but will peel within 1–2 years. |
| $8–14/pc | Good quality PU leather. Consistent finish, durable, easy to clean. The right choice for casual dining. |
| $15–25/pc | Full-grain cowhide leather. Genuine quality, natural grain, will last 5–10 years. The fine dining standard. |
| $25+/pc | Premium full-grain with specialised features (exotic grain, complex interior, multi-section). Usually custom for luxury properties. |
These are ex-factory prices from Shiling, Guangzhou. Add DHL shipping ($15–25/kg for small orders to Europe), import duties (check your country’s rate for HS code 4205), and a reasonable margin for the sourcing intermediary. Total landed cost is typically 30–50% above ex-factory price for small-to-medium orders.
The value calculation: 60 full-grain leather menu covers at $20/pc = $1,200 ex-factory. Add $200 DHL shipping = $1,400 total. Spread over 7 years of use = $200/year. For a busy restaurant, that’s less than $0.60 per day for something guests touch every single service.
8. The Sampling Process: Why You Should Always Order a Sample First
Every experienced hospitality buyer orders a sample before committing to production. This is not caution — it is standard professional practice. Here’s what a sample allows you to verify:
- Leather quality and texture in person — photos cannot communicate this accurately
- Logo placement and embossing quality — is the foil sharp? Is the positioning exactly right?
- Colour accuracy — does the tan brown match your restaurant’s existing palette?
- Size fit — do your actual menu pages sit correctly inside?
- Weight and feel — how does it feel when a guest picks it up?
- Closure function — does the magnetic snap work smoothly?
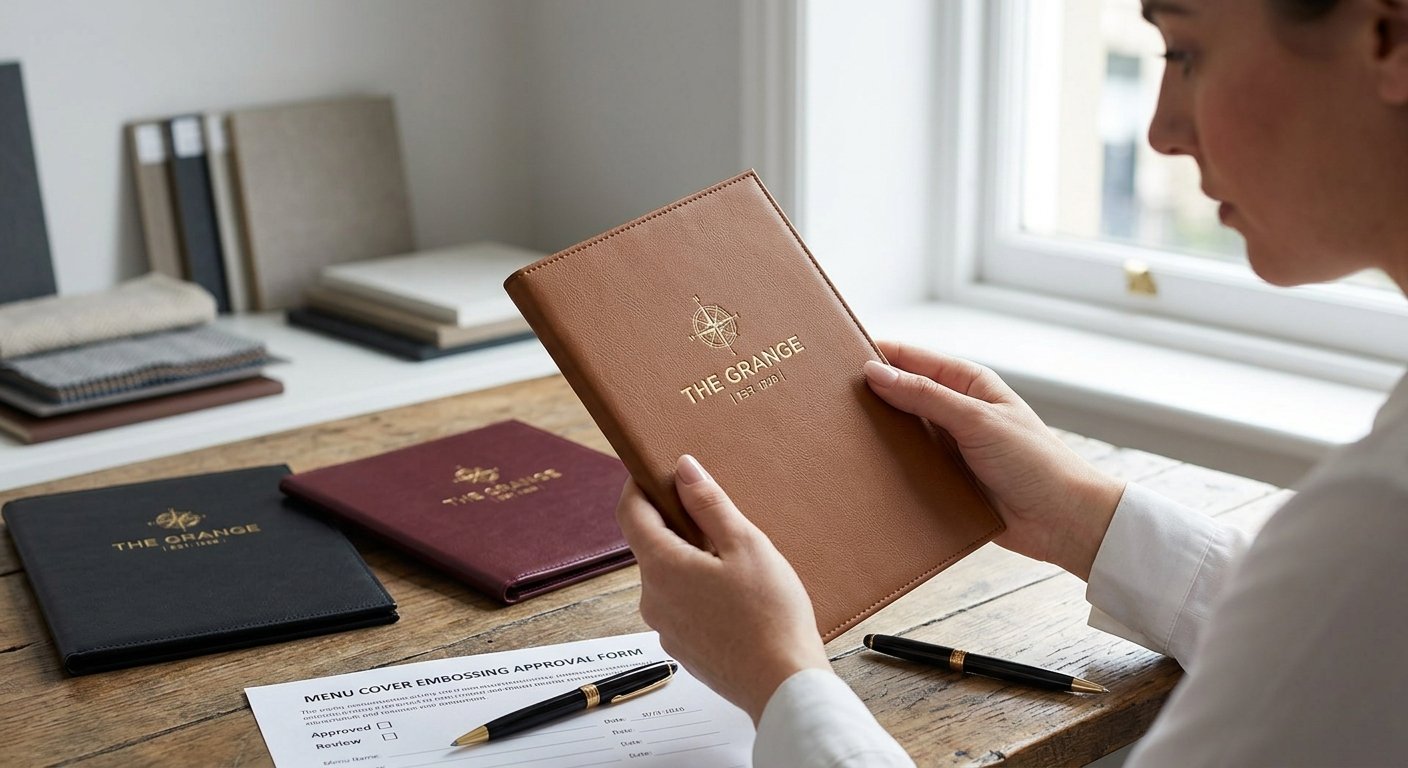
A pre-shipment sample set showing logo position, leather colour and interior pocket configuration before production approval.
Our sample fee is typically $15–40 per piece depending on complexity. We dispatch samples via DHL within 7 working days of artwork approval. The sample fee is credited back against your first production order — so if you proceed, it costs you nothing.
The only scenario where skipping a sample is reasonable: you have previously ordered from the same factory, for the same product, in the same spec. For first orders, always sample.
9. The Three Most Common Mistakes Restaurant Buyers Make
1. Choosing on price alone
The cheapest leather menu cover is almost always bonded leather. It looks fine in product photos. Six months into service, the surface starts peeling. You’re back to ordering again, having spent the same money twice. The cost-per-year calculation consistently favours investing in PU or full-grain leather on the first order.
2. Not accounting for size correctly
Ordering A4 covers for a menu that is actually A4+ (with bleed or oversize pages). The pages don’t sit correctly and the covers look wrong. Measure your actual pages — not the paper size — and specify the cover size from that measurement, adding 5–8mm border on each side.
3. Ordering without a sample from a new supplier
Photography is not a reliable indicator of leather quality. The grain, texture and feel of a leather cover can only be assessed by holding it. A supplier who declines to provide samples before production is a supplier to avoid. Any legitimate factory will provide samples — the question is the cost and lead time, not whether samples are available.
10. A Quick Checklist Before You Place Your Order
- Decided on material grade (full-grain / PU / vegan) based on your restaurant type and budget
- Measured your actual menu pages and calculated the correct cover size
- Chosen a leather colour that suits your interior and brand identity
- Decided on logo technique (gold foil / silver foil / blind deboss) and placement
- Specified interior configuration (open spine / corner pockets / sleeve / multi-pocket)
- Calculated quantity using the table count × 1.2 × menus per table formula
- Prepared your logo file in vector format (AI, EPS or PDF with outlined fonts)
- Ordered a sample before committing to full production
Ready to order your
leather menu covers?
Get a detailed quote within 24 hours. MOQ 50 pieces. Sample in 7 days. Factory-direct from Shiling, Guangzhou.